Master the Art of Cooking: Your Ultimate Guide to Perfectly Poached Eggs Every Time
Becoming skilled in the technique of poaching eggs is not just a culinary feat; it’s a fulfilling journey that transforms simple breakfast dishes into gourmet delights. Understanding the intricate balance of heat and timing is crucial for achieving flawless results. This comprehensive guide delves into the fundamental aspects that lead to perfectly poached eggs, providing you with the knowledge and methods necessary to consistently create culinary masterpieces. Whether you are a novice in the kitchen or a seasoned chef, this guide is designed to equip you with the skills required to prepare mouthwatering and beautifully presented poached eggs that will dazzle anyone dining at your table.
Choosing Superior Quality Eggs: The Essential First Step for Perfect Poached Eggs
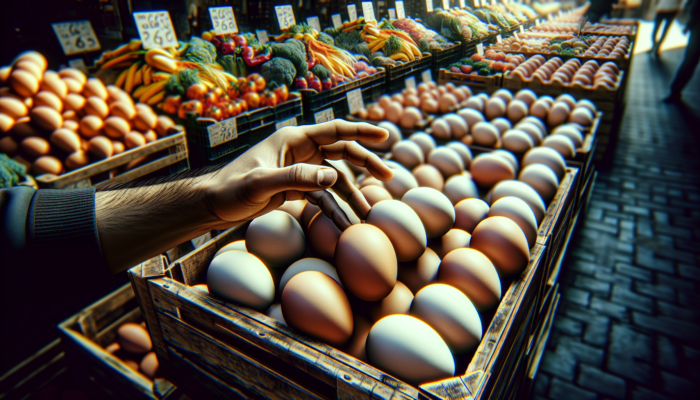
The journey towards crafting a stunning poached egg begins with the crucial task of selecting the right eggs, whether from a local grocery store or a nearby farmers’ market. It’s essential to recognize that not all eggs are created equal; their freshness and quality significantly influence the final dish. Fresh eggs exhibit tighter whites that help them retain their shape during cooking. When you crack a fresh egg, you will notice that the yolk sits higher and is surrounded by firmer, less runny whites. This firmness is vital for creating visually striking and delectable poached eggs that are as pleasing to the eye as they are to the palate.
When choosing your eggs, ensure that you select those with clean, unblemished shells. Look for eggs with a ‘best before’ date that is well into the future. Whenever possible, prioritize eggs sourced from local farms or reputable suppliers known for their high egg quality. Generally, organic and free-range eggs tend to be fresher, as hens raised in optimal conditions produce eggs with richer yolks and enhanced flavors that can elevate your culinary creations.
In summary, the path to mastering how to poach an egg perfectly every time commences with the selection of the finest eggs available. This foundational decision plays a crucial role in your success, guaranteeing that your poached eggs are not only visually appealing but also bursting with delightful flavor.
Understanding the Perfect Water Temperature: The Key to Successful Egg Poaching
The temperature of the water is a critical factor in the poaching process, as it directly impacts the quality of your results. The ideal poaching temperature falls between 80 and 90 degrees Celsius (176 to 194 degrees Fahrenheit). Within this precise temperature range, the water is sufficiently hot to gently cook the egg without reaching a violent boil, which can create an uncontrollable cooking environment. Boiling water can cause the egg whites to move too aggressively, leading to an unappealing appearance and uneven cooking results.
To achieve the perfect water temperature, start by heating a pot of water until it is just below boiling. Aim for a gentle simmer, where small bubbles can be seen rising to the bottom of the pot without disrupting the surface violently. While a thermometer can aid in accurately monitoring this temperature, with practice, you will develop the ability to recognize the right heat level through visual and auditory cues.
Once the correct temperature is achieved, it is crucial to maintain it throughout the cooking process. If the water cools down, the egg will take longer to cook and may not achieve that desired silky texture. Conversely, if the water begins to boil, quickly reduce the heat. Mastering the control of water temperature is fundamental in your quest to learn how to poach an egg perfectly every time.
Incorporating Vinegar: A Secret Ingredient for Perfect Egg Whites
Vinegar often goes unnoticed in the poaching process, yet it plays a significant role in helping your eggs attain the desired consistency. The acidity of vinegar accelerates the coagulation of proteins in the egg whites, which aids in maintaining the egg’s integrity while enhancing its overall texture. This aspect is particularly important when dealing with older eggs, as their whites usually lack the cohesion found in fresher eggs.
When adding vinegar to your poaching water, aim for approximately one tablespoon per liter. While white vinegar is commonly utilized, apple cider vinegar can provide a milder flavor profile if preferred. It is essential to ensure that the vinegar is evenly distributed in the water before introducing your egg, as this prevents uneven clumping and encourages a uniform cooking process.
Although vinegar does impart a subtle flavor, when poached correctly, its taste should remain delicate and should not overpower the egg’s natural richness. Understanding the importance of vinegar is crucial as you refine your skills for poaching an egg perfectly every time. This small addition can significantly enhance the quality of your poached eggs.
Step-by-Step Instructions: Perfecting the Art of Poaching Eggs
Adopting a systematic approach is essential for excelling at poaching eggs. With the right tools, techniques, and timing, you can consistently craft that perfect poached egg. Let’s outline a detailed step-by-step guide for this culinary adventure.
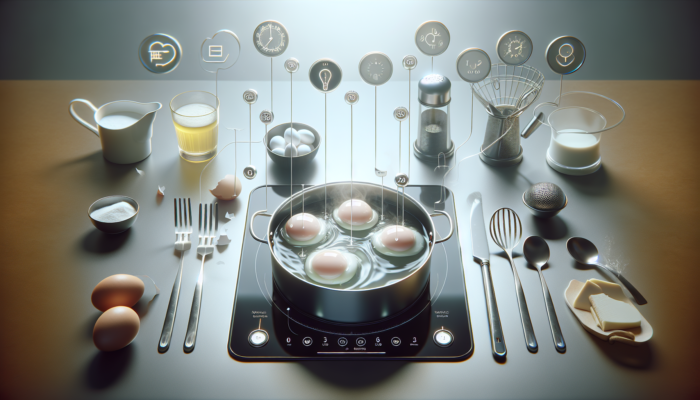
Setting Up Your Kitchen: Essential Tools and Ingredients for Poaching Success
Before embarking on the poaching process, it is vital to organize your kitchen space. Gather all necessary ingredients and tools to ensure that everything is easily accessible. To successfully poach eggs, you will need a pot, a slotted spoon, a timer, a bowl for cracking the eggs, and a thermometer for precise temperature monitoring.
Begin by filling your pot with enough water to completely submerge the eggs and place it on the stove. As mentioned earlier, bring the water to the desired temperature. While you wait for the water to heat up, prepare your eggs by cracking them into separate bowls. This method simplifies adding eggs to the pot and allows you to inspect each egg for any shell fragments or signs of spoilage before cooking.
Having an organized workspace not only streamlines the cooking process but also minimizes the likelihood of mistakes. Once you are confident that everything is in place, you are ready to move on to the next phase of the poaching process.
Applying the Swirling Water Technique: Step-by-Step Guide for Perfectly Shaped Eggs
The swirling water technique is one of the most effective methods for poaching eggs. This technique creates a gentle vortex that helps keep the egg intact during the cooking process. Here’s how to execute it:
First, once your water reaches the ideal temperature, gently stir it with a spoon to create a whirlpool effect. This motion aids in guiding the egg whites around the yolk, promoting cohesion and ensuring a more uniform shape. Next, take your bowl with the cracked egg and gently slide it into the center of the vortex.
Be cautious not to drop the egg from a height, as this can cause the whites to break apart. Instead, allow the egg to glide smoothly into the water. As the egg cooks, you will observe the whites wrapping around the yolk, forming that iconic poached egg shape.
Maintain the gentle swirl for several seconds to help the egg set. The key is to move the water delicately without escalating to a vigorous boil. Perfecting this technique is essential for anyone aiming to master how to poach an egg perfectly every time, as it significantly enhances the presentation of the final dish.
Mastering Timing: Optimal Cooking Duration for Perfect Results
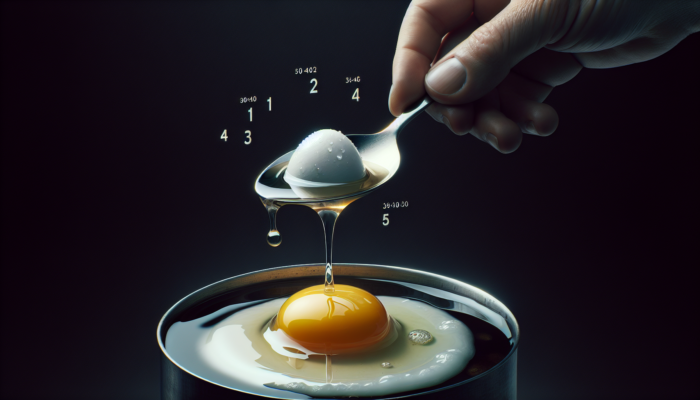
Timing is a pivotal factor in achieving the perfect poached egg. The cooking time may vary slightly based on the size of the egg and your preference for yolk consistency. Typically, poaching an egg for about 3 to 4 minutes results in a runny yolk, while a firmer yolk may require up to 6 minutes.
To ensure consistency, start your timer as soon as the egg enters the water. For those new to poaching, utilizing a timer is beneficial to prevent overcooking. Once the time is up, gently lift the egg from the water using your slotted spoon and check for doneness. The whites should be set, while the yolk should still feel soft and slightly bouncy to the touch.
If you occasionally overcook an egg, don’t be disheartened. Use this experience to adjust your timing for future attempts. With practice, you’ll develop an intuitive understanding of how long to poach for your desired level of doneness—an essential skill in how to poach an egg perfectly every time.
Careful Removal and Draining: Techniques for Preserving the Shape of Your Poached Eggs
After achieving your desired cooking results, the next step is to remove the eggs from the water without compromising their shape. This is where a slotted spoon proves invaluable. Gently slide the spoon beneath the egg, ensuring you provide adequate support as you lift it out of the water.
Once the egg is lifted, draining any excess water is crucial. To absorb moisture, place the egg on a plate lined with kitchen paper or a clean towel. This step is particularly important if you’re planning to serve the eggs on toast or in a dish where excess moisture could lead to a soggy texture.
For a more appealing presentation, consider trimming any uneven edges of the egg whites using kitchen scissors. This simple adjustment can enhance the visual appeal of your dish. By carefully removing and draining the eggs, you are well on your way to mastering how to poach an egg perfectly every time.
Avoiding Common Pitfalls: Key Tips for Flawless Poached Eggs
Even seasoned cooks can fall prey to common mistakes when poaching eggs. Recognizing these pitfalls allows you to continually refine your technique and achieve exceptional results. Let’s examine frequent errors and how to avoid them.
Preventing Overcooking: Recognizing Signs and Implementing Solutions
Overcooking is one of the most common mistakes made when poaching eggs. If you’ve ever encountered a rubbery texture or a yolk resembling a hard-boiled egg, you understand the disappointment that follows. The key to avoiding overcooking lies in closely monitoring both your timing and the water temperature.
To prevent overcooking, use a timer and check your eggs one minute earlier than you anticipate they will be done. You can also gently poke the egg with a spoon; it should feel firm yet have a slight give if it’s perfectly poached. If you frequently find your eggs overcooked, consider adjusting your heat settings or investing in a reliable kitchen timer.
Additionally, due to residual heat, eggs continue to cook slightly even after being removed from the water. This is another reason to be cautious with your cooking times.
Preventing Egg Disintegration: Strategies for Maintaining Cohesion
Another common issue is egg disintegration, where the whites disperse in the water instead of remaining cohesive. This frustration often stems from using older eggs or excessively hot water.
To prevent disintegration, always choose the freshest eggs available. The tighter whites of fresh eggs will hold their shape more effectively. If you must use older eggs, adding vinegar to the water can help tighten the whites and improve their cohesion.
Furthermore, ensure that your water is at the right temperature before introducing the egg. If the water is too hot, it can cause the egg to break apart. Utilizing the swirling method to create a vortex also aids in keeping the egg together during cooking. By being mindful of these factors, you can minimize the risk of egg disintegration and enhance your skills in poaching an egg perfectly every time.
Ensuring Consistent Cooking: Tips for Even Results
Uneven cooking occurs when heat isn’t distributed evenly or if there is insufficient water movement. If you notice that certain parts of the egg are overcooked while others remain runny, it’s time to reassess your technique.
To combat uneven cooking, ensure your pot is large enough to allow proper water circulation. A smaller pot can lead to overcrowding, which may result in inconsistent cooking. Additionally, maintain a gentle simmer and ensure that the water swells when adding the egg. This movement guarantees that heat is evenly distributed around the egg, leading to more consistent results.
By mastering these common mistakes, you can boost your confidence in the kitchen and refine your ability to produce perfect poached eggs, deepening your understanding of how to poach an egg perfectly every time.
Enhancing Your Poaching Skills: Innovative Tools and Gadgets to Consider
Having the right tools can significantly influence your results in the pursuit of culinary excellence. While traditional methods can be effective, innovative gadgets can offer convenience and precision. Let’s explore some of these tools and evaluate their usefulness for your poaching endeavors.
Evaluating Egg Poachers: Are They Worth the Investment?
Egg poachers are popular kitchen gadgets specifically designed for cooking eggs gently. They typically consist of a pan with inserts that hold the eggs above simmering water, creating a controlled cooking environment. This method can be particularly beneficial for those new to poaching, as it simplifies the process and minimizes the risk of errors.
However, while egg poachers may provide convenience, they might not offer the same level of control as traditional methods. The water temperature can fluctuate, preventing the eggs from achieving that classic poached texture. An egg poacher can be an excellent way for beginners to build confidence, but for those aiming to master how to poach an egg perfectly every time, it is advisable to learn the classic technique first.
Ultimately, whether to invest in an egg poacher depends on your cooking style and how frequently you plan to prepare poached eggs. If you enjoy experimenting in the kitchen, it could be a valuable addition to your collection.
Silicone Cups: A Practical Solution for Aspiring Poachers
Silicone cups have gained popularity as a practical solution for poaching eggs. These flexible cups can be placed directly into simmering water, allowing for even cooking without the need for swirling. This method can be particularly advantageous for beginners who may find the swirling technique challenging.
To use silicone cups, lightly grease them to prevent sticking, crack an egg into each cup, and then place them in a pot of simmering water. Cover the pot with a lid to trap heat and steam, resulting in perfectly poached eggs. The silicone material ensures easy removal and minimal cleanup, making them an excellent choice for busy mornings.
While silicone cups may not replicate the traditional poaching experience, they are a fantastic tool for those learning how to poach an egg perfectly every time. They provide a forgiving method that yields satisfying results without the stress of managing water temperature and swirling techniques.
Diving into Sous Vide: The Pinnacle of Precision Poaching
For those who desire the utmost cooking precision, the sous vide method offers an innovative approach to poaching eggs. Sous vide involves vacuum-sealing food in a bag and cooking it in a water bath at a precisely controlled temperature. This technique enables you to poach eggs to your preferred doneness with minimal effort.
To sous vide poach eggs, set your immersion circulator to your desired temperature—typically around 63 degrees Celsius (145 degrees Fahrenheit) for a runny yolk. Place the eggs in their shells directly into the water bath and cook them for approximately 45 minutes. The result is an egg cooked evenly throughout, boasting a silky texture that is challenging to achieve through traditional methods.
While sous vide machines can represent a significant investment, they are an impressive option for those passionate about cooking and eager to experiment with precision. If you are serious about perfecting how to poach an egg perfectly every time, this method can elevate your culinary repertoire.
Showcasing Your Poaching Skills: Delicious Recipes and Serving Ideas for Poached Eggs
Having mastered the fundamentals of poaching eggs, it’s time to showcase your culinary skills with some delightful recipes. Poached eggs are remarkably versatile and can elevate a wide range of dishes. Let’s explore some classic and contemporary serving suggestions that highlight the elegance of a perfectly poached egg.
Classic Eggs Benedict: A Timeless Brunch Favorite
Eggs Benedict is perhaps the quintessential poached egg dish, combining rich flavors with an elegant presentation. To prepare this classic, start by toasting English muffins and adding crispy bacon or smoked salmon. Place a perfectly poached egg on top, allowing the golden yolk to cascade over the other ingredients.
For the finishing touch, whip together a homemade hollandaise sauce by whisking egg yolks, lemon juice, and melted butter until smooth and creamy. Drizzle the hollandaise over the poached egg and garnish with fresh herbs or a sprinkle of paprika to add a pop of color and flavor. This dish not only showcases your poaching skills but also makes a stunning impression at brunch gatherings.
Eggs Benedict is a timeless dish that celebrates the delicate flavors of poached eggs while providing a satisfying meal perfect for any occasion. By mastering this recipe, you’ll move one step closer to mastering how to poach an egg perfectly every time.
Avocado Toast with Poached Eggs: A Modern Brunch Essential
Avocado toast has swiftly become a modern brunch staple, and adding a poached egg elevates it to new culinary heights. To create this dish, start with a slice of artisanal bread, toasted to perfection. Mash ripe avocado with lemon juice, salt, and pepper, then spread it generously over the toast.
Top the avocado with a perfectly poached egg, allowing the yolk to break and mingle with the creamy avocado. Enhance the dish with toppings like feta cheese, cherry tomatoes, or a sprinkle of dukkah for an extra burst of flavor. This combination provides a delightful balance of textures and tastes while offering a nutritious meal.
Avocado toast with poached eggs is not only visually appealing but also a fantastic way to incorporate healthy fats and protein into your diet. This dish exemplifies the versatility of poached eggs and their ability to enhance even the simplest of meals.
Poached Eggs in Soup: A Comforting and Luxurious Twist
Consider adding poached eggs to your favorite soup for a comforting and hearty option. The richness of the yolk can elevate the overall flavor of the dish while providing a satisfying element. Classic choices include ramen or minestrone, where the poached egg adds a touch of luxury.
To prepare, poach your eggs separately and carefully place them atop the soup before serving. The residual heat will warm the egg, allowing the yolk to remain runny while enhancing the soup’s depth of flavor. This approach is an excellent way to showcase your poaching skills while creating a nourishing and comforting meal.
Incorporating poached eggs into soups not only adds dimension but also transforms a simple dish into an elegant offering. By experimenting with various recipes, you’ll continue to refine your understanding of how to poach an egg perfectly every time.
Expert Insights: Frequently Asked Questions and Pro Tips for Poaching Eggs
Can You Poach Eggs in Advance? Storage and Reheating Guidelines
Yes, you can poach eggs ahead of time! To store them, place the eggs in a bowl of cold water and refrigerate for up to two days. When you’re ready to enjoy them, reheat the eggs in simmering water for about 1-2 minutes until warm.
How to Ensure a Consistently Runny Yolk
To guarantee a runny yolk every time, poach the eggs for 3-4 minutes at the correct temperature (80-90°C). Using fresh eggs will also help, as they maintain their shape better during cooking.
Poaching Multiple Eggs: Techniques for Maintaining Quality
When poaching several eggs, it is best to do so in batches. Use a larger pot to provide ample space for each egg. Keep a consistent water temperature and utilize the swirling method to prevent them from sticking together.
Can I Add Salt to the Water When Poaching Eggs?
While some chefs prefer to add salt to the water, it’s advisable to avoid it, as it can cause the egg whites to break apart. Instead, season the finished eggs to taste after poaching.
How Do I Determine When My Poached Egg Is Done?
Check for doneness by gently pressing the egg; it should feel firm yet still have a slight give. Alternatively, you can cut into the egg to assess if the yolk is runny, based on your preference.
What is the Best Pan for Poaching Eggs?
A wide, shallow pan is ideal for poaching eggs, as it allows for even water distribution. A non-stick pan can also be beneficial, helping to prevent the eggs from sticking and making removal easier.
Can I Freeze Poached Eggs?
Freezing poached eggs is not recommended, as the texture may change upon thawing. It is best to poach eggs fresh, although they can be stored in the fridge temporarily.
What Should I Do If My Egg Whites Spread Out in the Water?
If your egg whites spread, it may be due to using older eggs. Adding vinegar to the water can help coagulate the whites faster and keep them contained, thus preventing spreading.
Are Poached Eggs Healthy?
Yes, poaching eggs is a healthy cooking method, as they are prepared without added fats or oils. They are an excellent source of protein and essential nutrients, fitting well into various dietary plans.
Can I Poach Eggs in Flavored Broth?
Absolutely! Poaching eggs in flavored broth can add depth and enhance the overall taste of your dish. When adding the eggs, ensure the broth is at the right temperature and not boiling for optimal results.
Connect with us on Facebook for the latest updates!
The post Poaching Eggs Perfectly: The Ultimate Aussie Guide appeared first on https://cookinggods.com
The Article Perfect Poaching Eggs: Your Ultimate Aussie Guide Was Found On https://limitsofstrategy.com
The Article Poaching Eggs Perfectly: The Essential Aussie Guide First Appeared ON
: https://ad4sc.com
Comments are closed